Model documentation
To generate Model Documentation:
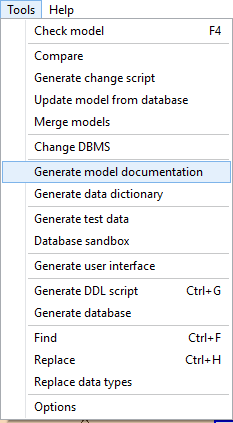
1. Select “Tools | Generate Model Documentation” on the menu bar:
![]()
![]() You can also
click on the icon from the toolbar:
You can also
click on the icon from the toolbar:
![]()
|
Available in: Free(Basic documentation), Starter, Standard, Professional and Enterprise Editions |
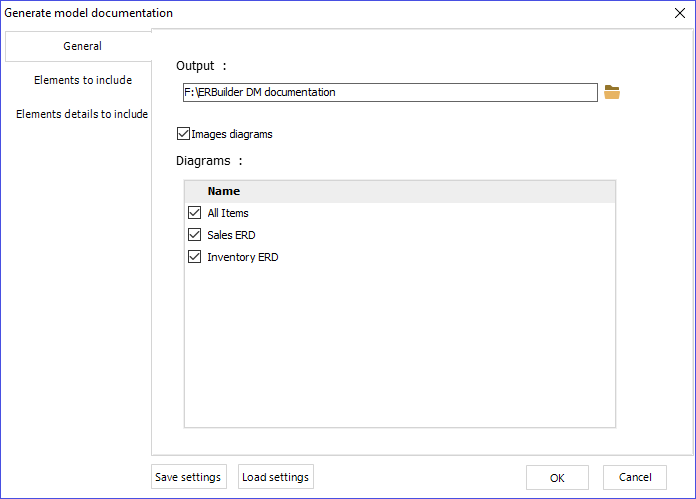
2. A setting window will appear, containing three tabs:
● General: In this tab, you will need to:
- Select a Directory to save the model documentation.
- You can check the Images Diagram to embed the diagram model image into the model documentation.
- Select diagrams to include in the model documentation generated.
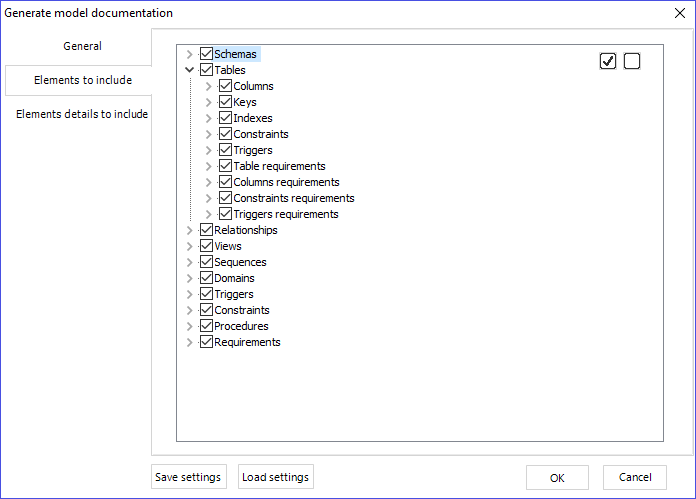
● Elements to include: This part consists of checking the elements of the treeview composed of Tables, Columns, Views, Procedures, Sequences, Domains, Relationships, etc. and their own fields. If you check these elements, the model documentation will include a table with their fields and their values.
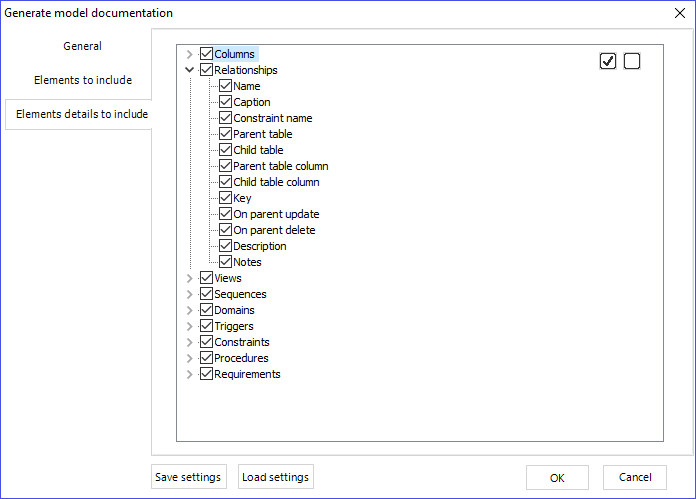
● Elements detail to include: This part is similar to the Previews part. You just need to check elements of tables and columns with their fields to detail them. The documentation model will contain a table with fields and values for each table and column.
● You can check all elements of treeview with the checkbox in the top right:
![]()
● You can uncheck all elements of treeview with the checkbox in the top right:
![]()
● You can save your model documentation settings to reuse them later in another project.
To save settings:
1. Click on the “Save Settings” button, and name your settings file (*.CFG)
![]()
To load previously saved settings:
1. Click on the “Load Settings” button, browse to your file (*.CFG) and open it.
![]()
|
Available in: Starter, Standard, Professional and Enterprise Editions |