A Guide to Generate Data Model Documentation and Sharing it directly on Confluence
April 30, 2023
When designing a database, one of the most important steps is creating an Entity-Relationship (ER) model. This model helps to define the various entities, their attributes, and the relationships between them. However, simply creating the ER model is not enough. It is also essential to document it thoroughly so that others can understand it as well.
In this post, we will explore how to generate documentation for your ER model and share it directly on Confluence.
About Confluence
Confluence is a collaboration platform developed by Atlassian, designed to help teams organize, share, and collaborate on information. It provides a range of features including wikis, blogs, and document management, making it a comprehensive platform for teams to centralize information and work together. Confluence integrates with other Atlassian products such as JIRA and Trello, making it an excellent solution for organizations that use multiple tools for project management and collaboration.
Step 1: Setting Up ERBuilder
After downloading and installing ERBuilder on your computer, connect your database to get your entity-relationship diagram (ERD).
Run the ERBuilder app, then create a new connection to your database from the home screen (or navigate to “File | manage connections”) as follows:
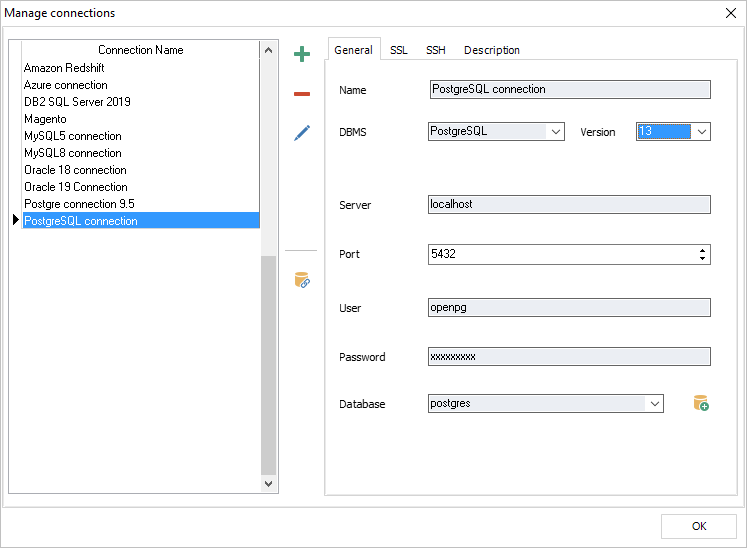
Now, go to “File | Reverse engineer”, select the connection you created before and follow the steps to get the entity-relationship for our database.
Step 2: Setup Confluence connection
To enable collaboration and sharing of your documentation within your team, ERBuilder can be integrated with Atlassian's Confluence collaboration tool. Follow the steps below to establish a connection between ERBuilder and Confluence:
-
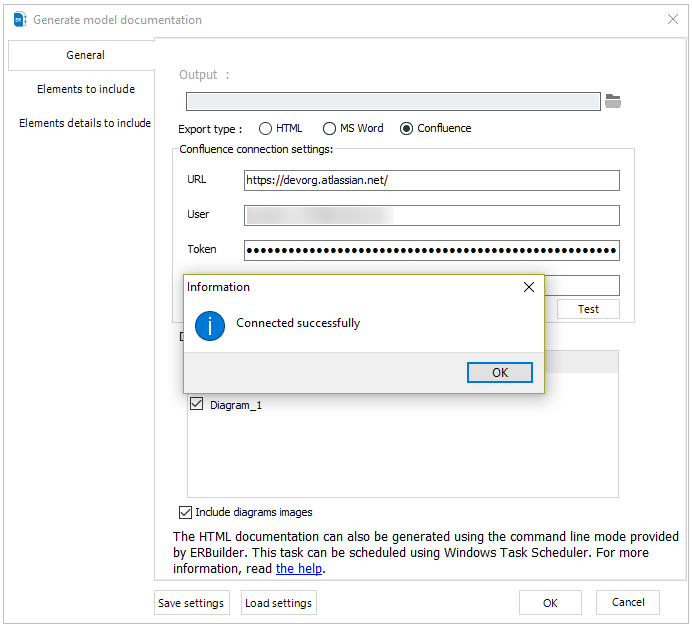
First, navigate to “Tools | Generate model documentation” from the menu bar. Select “Confluence” as export type.
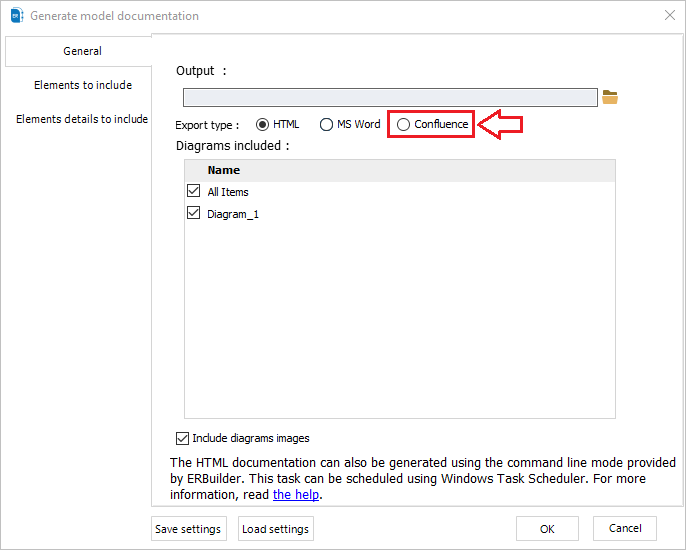
- Enter the Atlassian domain URL in the appropriate field. This URL should include the specific domain for your Confluence instance.
- Enter the User for the Confluence instance in the appropriate field.
- Generate a token for the user account by navigating to the “Manage Account” section in Confluence.
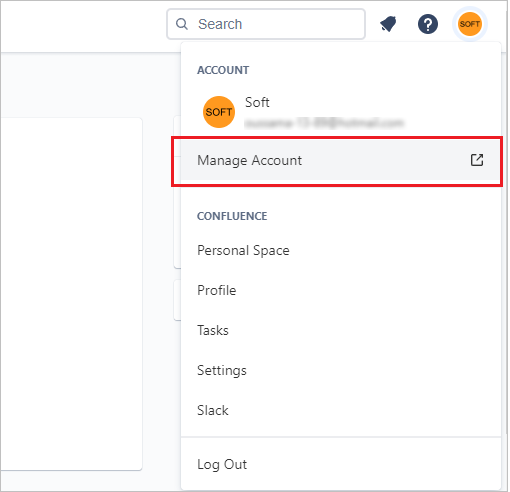
- Select “Security”, and then click to “Create and manage API tokens” on the API token section.
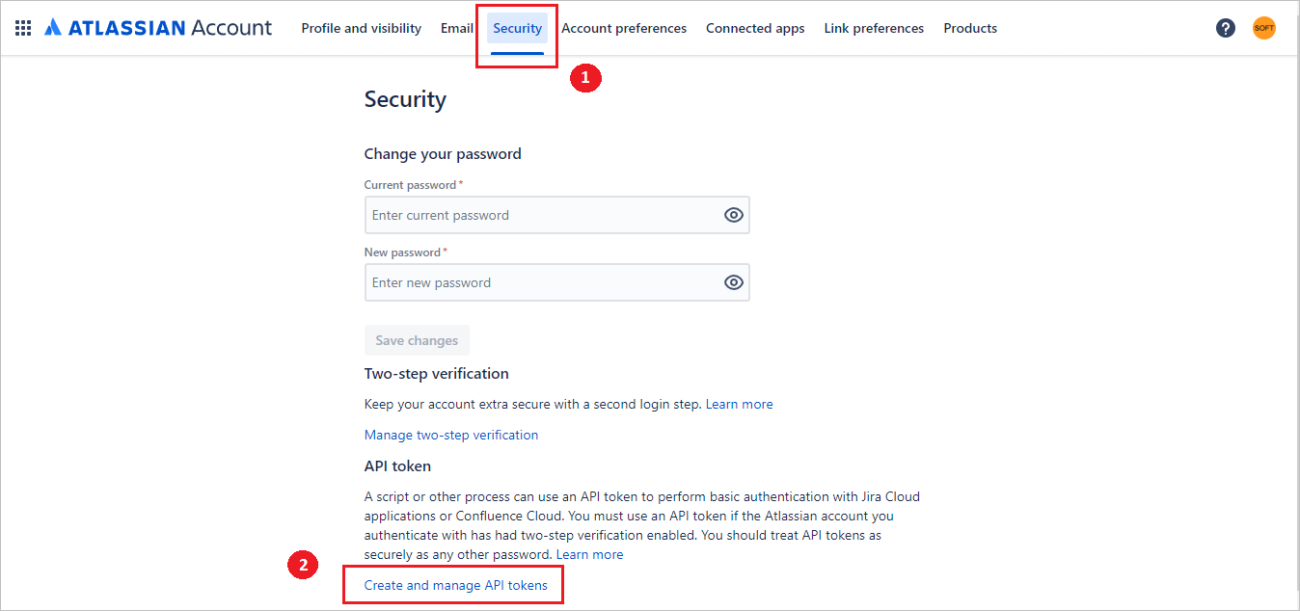
- Click on “Create API token”.
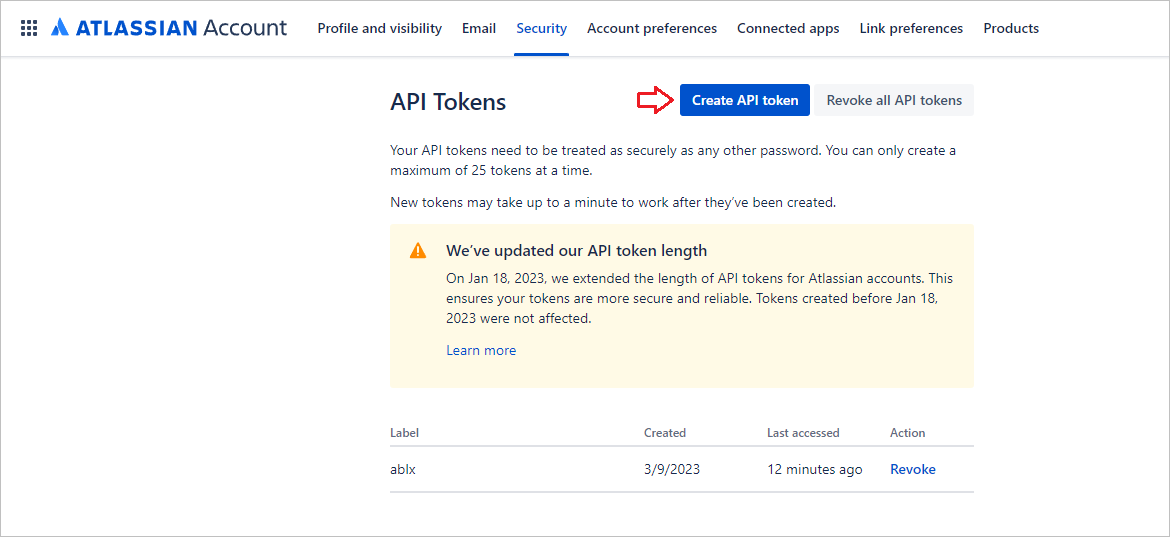
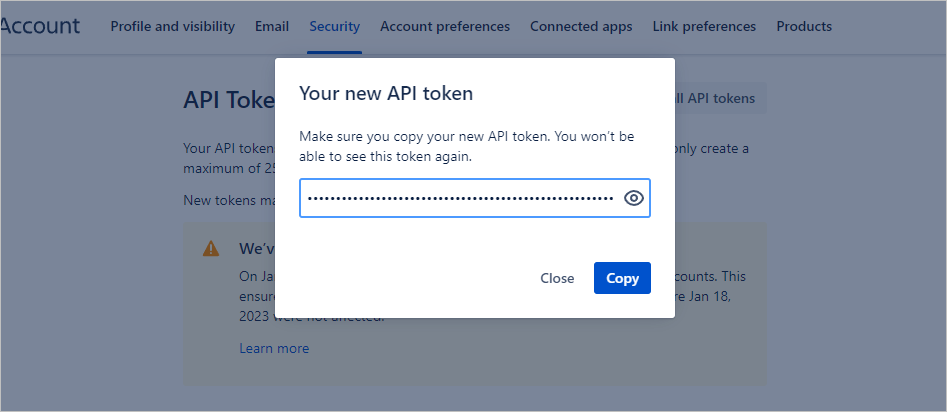
- Choose a label for your new API token the label must be short and easy for you to remember, then click create. Once created, copy your token then enter it in the appropriate field. This token allows ERBuilder to access the Confluence instance using the user account's permissions.
- Now, enter the space key for the specific Confluence space where you want to publish the documentation. You can get the space key from the URL of your space as follows:

- Finally, test your connection. If you followed the steps, carefully, you should get the “successful connection” message.
Step3: Generating Documentation
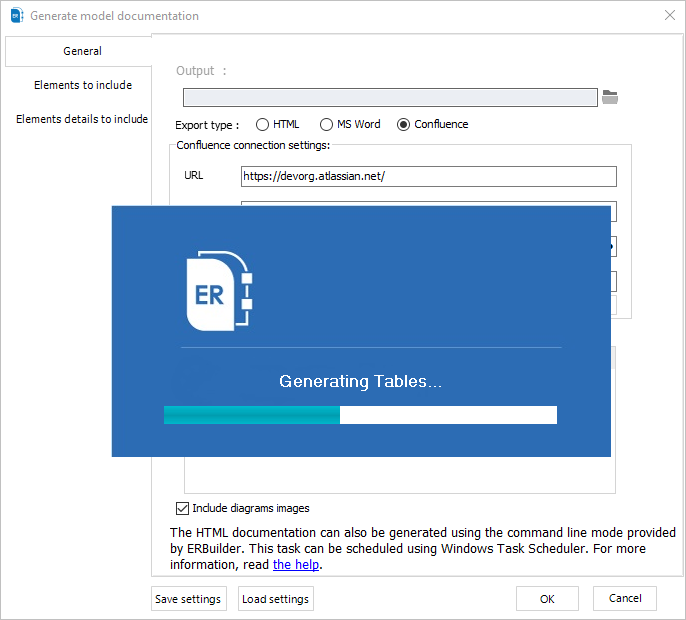
Now that your Confluence account is connected with ERBuilder, and after you documented your database elements, you can start generating your documentation and share it directly into the Confluence space you specified in the settings step.
From the same windows of the Confluence settings, on the left, navigate to “Elements to include” and “Elements details to include” and choose what do you want to include into the documentation.
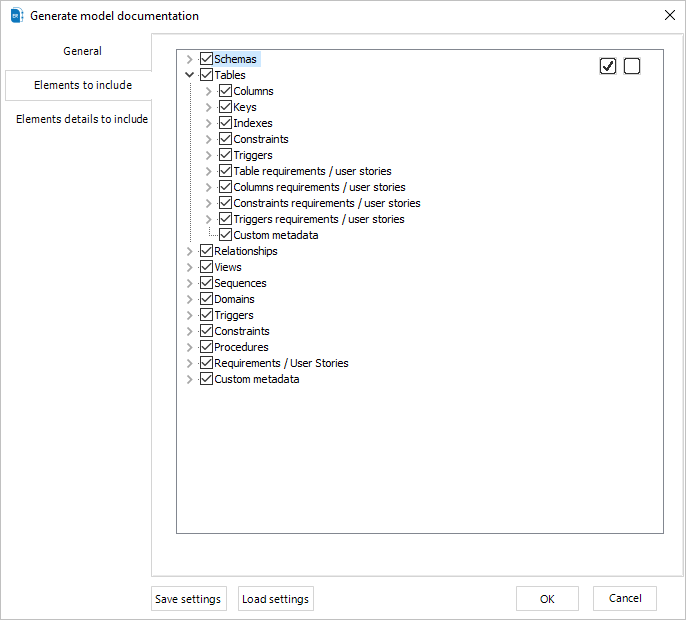
Click on the “OK” button to start the generation process.
Final results
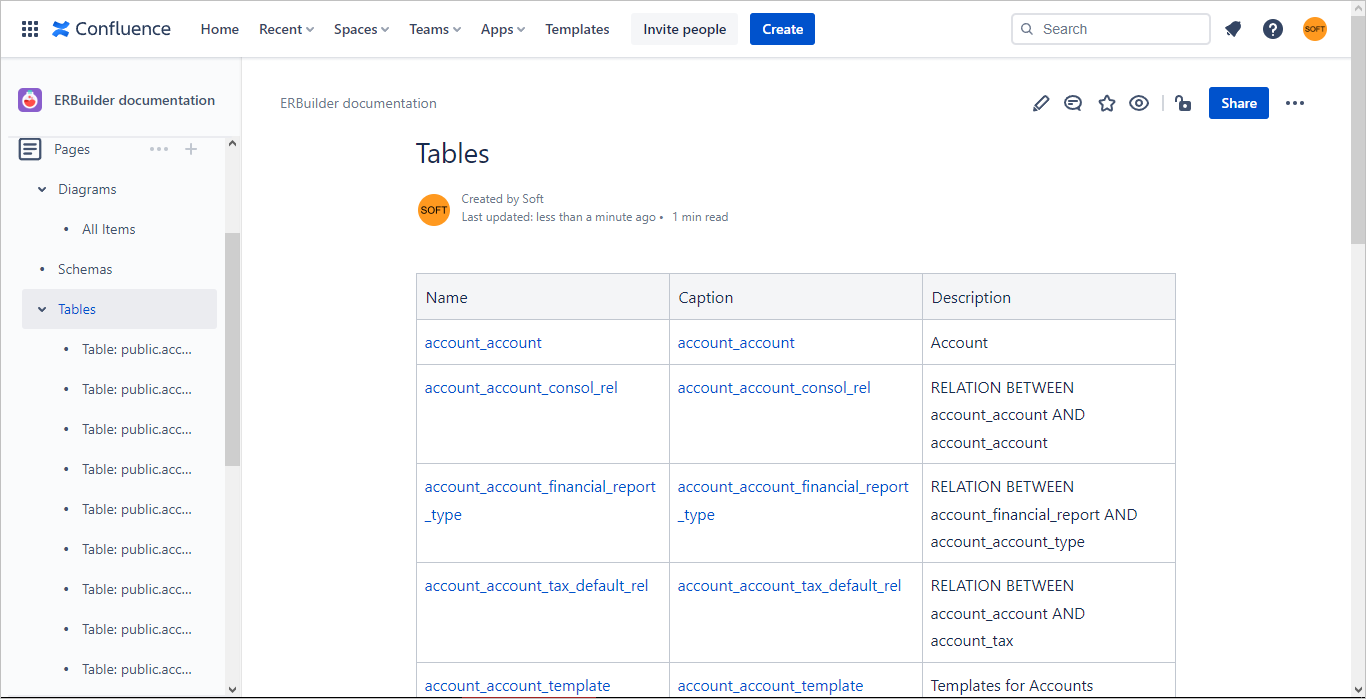
Finally, you will get your database documentation published on the Confluence space you specified on the setting step.
Read more related posts
Subscribe To Our Newsletter
Subscribe to our email newsletter today to receive updates of the latest news, tutorials and special offers!


